
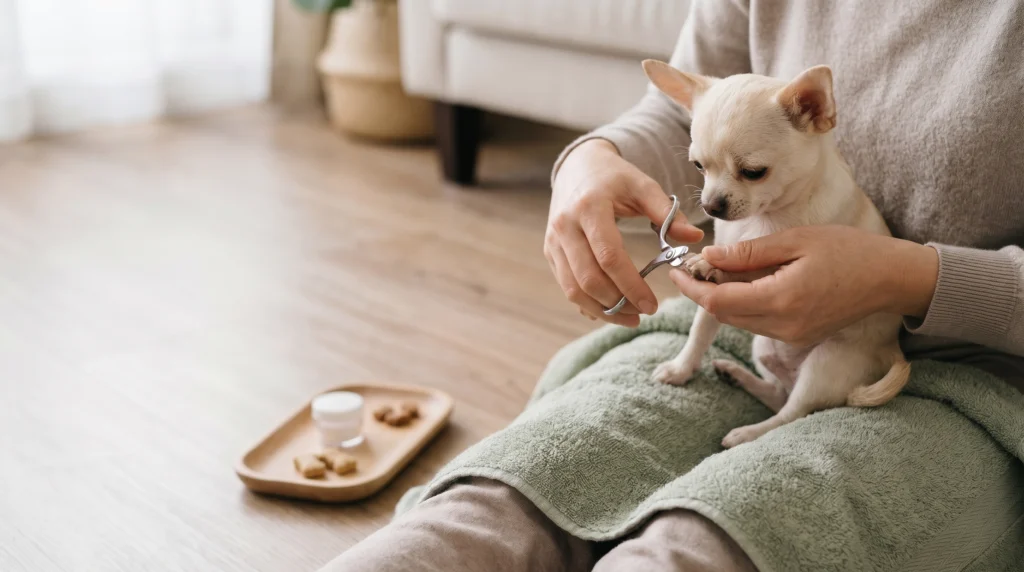
Tiny paws, tiny nails, and a big worry: what if you cut too far, or your dog wriggles out of your lap? If you are learning how to trim a teacup dog’s nails, those fears are understandable.
You can trim a very small dog’s nails safely at home with tiny cuts, a steady hold, and a little practice.
This guide walks you through how often to trim, how to find the quick, which tools suit tiny nails, and how to hold a small dog while lowering the risk of a fall. You will also learn how to judge how much nail to remove, how to handle black nails, what to do if a nail bleeds, and how to help a nervous dog relax.
How Often to Trim a Teacup Dog’s Nails
Most dogs need a nail trim about once a month, but the right schedule depends on how fast your dog’s nails grow and how much they wear down. VCA veterinarians explain that dogs who are inactive or rarely walk on hard surfaces may need trims about every three weeks, while dogs who walk a lot on pavement may go a little longer.
You don’t have to guess. Check the nails once a week and look for these signs:
- The nails touch the floor when your dog is standing still.
- You hear clicking when your dog walks on tile or wood.
- The nails catch on carpet, blankets or your clothes.
These signs mean it is worth checking the nails more closely. SPCA New Zealand advises looking at your dog’s posture, comfort and movement too, rather than relying on clicking alone, because there is no single ideal length for every dog. Ask your vet to show you a good length for your dog.
Long nails are more than a looks problem. They can change how a dog places its feet, and a long nail that snags can break, which is painful and can bleed for a long time.
Why Tiny Dogs Need a Gentler Approach
The trimming method is the same for a teacup dog as for any dog. What changes is how carefully you handle the dog.
“Teacup” is a sales term, not an official size that major breed registries recognize. Most dogs sold this way are very small Chihuahuas, Yorkshire Terriers, Pomeranians, Maltese, Toy Poodles or similar toy breeds. For a closer look at what the label means, see our guide to the difference between teacup and toy dogs.
A very small dog brings three extra things to think about:
- Seeing clearly matters even more. Tiny nails are hard to see, so bright light and a small tool that doesn’t hide the nail make a real difference.
- Falls can cause serious injury. A review in the Canadian Veterinary Journal linked lower front leg fractures in small dogs mainly to falls, and the typical case was a small dog jumping out of its owner’s arms.
- Short, calm sessions help, especially for young puppies. Very small toy puppies are prone to low blood sugar, so ask your vet about meal timing if your puppy is very young.
Find the Quick Before You Cut
The quick is the living center of each nail. It holds blood vessels and nerves, so cutting into it hurts and makes the nail bleed. Every trim is really about one goal: take off the dead tip and stay away from the quick.
On light or clear nails, the quick shows as a pink area inside the nail. On black nails you usually can’t see it, so you take only tiny amounts and stop whenever you’re unsure. There is more on black nails below.
When nails stay long, the quick may extend farther toward the tip, which limits how short you can safely trim them.
If you feel nervous, practice the clipping motion before you touch your dog. VCA suggests trying your clippers on things like cocktail straws or dry pasta to get a feel for how they cut. This lets you practice operating the tool before handling your dog.
Pick the Right Tools for Tiny Nails

You need only a few things, and smaller is usually better for a tiny paw. Choose tools that let you see the nail clearly and that feel comfortable in your hand.
Clippers
There are two main types of dog nail clippers, and vet sources don’t agree on which is best.
| Type | How it works | What vet sources say |
|---|---|---|
| Scissor style | Two short, sharp blades cross like scissors | VCA’s veterinary behavior team recommends this type |
| Guillotine | The nail goes through a small hole and a blade slides across it | Washington State University’s veterinary hospital calls it the easiest type for dogs, but VCA warns it can crush the nail instead of cutting it cleanly |
The ASPCA and another VCA guide say both types work well, so the real answer is simple. Choose the style you can control best, keep the blades sharp, and pick a small size made for small dogs or cats. A clipper that is too big hides the nail and makes tiny cuts harder.
Nail Grinders
A grinder is a small rotary tool that sands the nail down instead of cutting it. Grinding leaves smooth edges, carries less risk of hitting the quick, and is easier for some dogs to accept than clipping.
Grinders have downsides too, especially for tiny breeds with long coats:
- Hair can wrap around the spinning head. Pull long hair back from the paw before you start, as the AKC advises.
- The nail can heat up. VCA suggests touching each nail for only 1 to 2 seconds at a time.
- The tool can burn the skin if it slips, so work slowly with a firm, gentle grip.
- The noise and buzzing can scare some dogs. Introduce the sound slowly before you ever touch a nail.
Even if you mostly grind, keep clippers on hand for spots a grinder can’t reach.
What Else to Have Ready
- Styptic powder, a clotting powder that stops bleeding if you nick the quick. Cornstarch or flour can work as a backup.
- Small, soft treats your dog loves.
- Bright light, so you can see each nail clearly.
- A towel and a nonslip mat for your lap or the floor.
- A nail file to smooth rough edges.
Get Your Dog Comfortable First
A calm dog is a safer dog, so build comfort before you ever cut. VCA’s veterinary behavior team recommends breaking the process into tiny steps and pairing each one with a treat your dog loves.
Keep early sessions very short. For some dogs, a single 15 second session is enough at first. Feet are sensitive, so slide your hand gently down the leg to reach the paw instead of grabbing it.
Here is a simple plan based on that approach. Only move to the next stage when your dog stays relaxed and keeps taking treats.
| Stage | What you do |
|---|---|
| 1 | Glide your hand down a leg to the paw, then give a treat |
| 2 | Hold the paw gently and touch each nail, with a treat after each |
| 3 | Show your dog the clippers or grinder and give a treat. For a grinder, turn it on across the room first |
| 4 | Touch the tool to a nail without cutting, then give a treat |
| 5 | Trim one tiny sliver from one nail, give a treat, and stop for the day |
| 6 | Slowly add more nails over the following sessions |
If your dog gets worried at any stage, go back to the step before. This can take a few minutes for some dogs and a few months for others, and that is perfectly fine.
Puppies are the easiest to start with. The AKC suggests handling your puppy’s paws from the very first day, so nail care becomes a normal part of life.
How to Hold a Very Small Dog for a Nail Trim
A low, steady setup works well for most tiny dogs. Sit on the floor or a low couch with your dog in your lap or right beside you, in a supported position it finds comfortable. Purdue University’s canine welfare team suggests letting your dog choose whether to sit, stand or lie down.

Staying low matters because falls can cause serious injury in small dogs. Keep your dog close to the floor, and never leave it alone on a table, bed or other raised surface.
To hold a paw, the AKC describes a simple grip. Place your thumb on the pad of a toe and your forefinger on top of the toe, just above the nail. Gently push your thumb up and back on the pad while your forefinger pushes forward. This makes the nail stick out so you can see it.
A few more tips for tiny dogs:
- Support the body with your other arm. Your dog should feel secure, not squeezed.
- Ask a helper to feed small treats and steady your dog gently. Trims are often easier with a second pair of hands.
- Skip heavy restraint. Some guides describe leaning your body over a dog to keep it still. That is far too much for a tiny dog and can frighten or hurt it.
- Never hold tighter when your dog struggles. Pause, let your dog settle, and try again later.
Before You Start: Home Trim, Groomer or Vet?
Home trimming works best when your dog accepts paw handling, the nails are healthy, and you can clearly see what you are cutting. If any of that isn’t true yet, get help first. That is a normal part of care, not a failure.
| Ask a groomer or vet tech for help | See your veterinarian |
|---|---|
| You want to learn how to position the clippers | A nail or dewclaw is growing into the paw pad |
| The nails are healthy but you’re unsure where to stop | A nail is torn, split or damaged |
| Your dog has dark nails and no one has shown you yet | There is swelling, pain or limping |
| You’d like routine trims done while you practice at home | Bleeding is heavy or won’t stop |
| The nails are overgrown and need a careful first trim | Your dog freezes, tries to escape or tries to bite |
Purdue’s canine welfare team advises stopping and asking your vet for help if your dog freezes, tries to escape or tries to bite during a trim.
How to Trim a Teacup Dog’s Nails Step by Step
Once your dog is comfortable being handled, here is how to trim small dog nails safely. Go slowly. Small, controlled cuts let you check your progress as you go, but they can still reach the quick if you keep going too far.
- Get set up. Pick a calm time, sit low with your dog in your lap, and put your tools, treats and styptic powder within reach. Use bright light.
- You can begin with a light colored nail if its quick is easier to see. Assess every nail separately, and don’t use one nail’s cutting point as a guide for the others.
- Hold one toe with the grip described above, so the nail sticks out clearly.
- Remove only a small tip that you can confidently judge to be beyond the quick.
- Inspect the nail after each cut, and leave space before the visible quick.
- Stop if you can’t confidently judge the next cut. That nail can wait for another session.
- Reward your dog, then move to the next nail or stop for today.
- Smooth any sharp edges with a nail file or a quick touch of a grinder.
On a tiny nail, small distances are hard to judge by eye. When in doubt, take less. You can trim a little more at the next session, but you can’t undo a cut that goes too far.
Trimming Black Nails
Dark nails make the quick difficult to judge, so take only tiny amounts and go slowly.
Veterinary guides, including Washington State University’s veterinary hospital, describe changes that appear on the cut surface as you get close to the quick. These cues can be hard for beginners to read, and different guides describe them in different ways.
So don’t keep cutting while you wait to see a particular dot, ring or color. Stop whenever you’re unsure about the next cut.
If black nails make you nervous, ask your vet or a vet tech to show you on your own dog first. Washington State University and the AKC both recommend learning from a veterinary professional before you start.
Don’t Forget the Dewclaws
Dewclaws are the small extra nails on the inner side of the leg, a little higher than the other toes. Not every dog has them.
Because they sit higher on the leg, dewclaws get little wear during ordinary walking. Washington State University and VCA both warn that they can grow long enough to curl into the paw pad, which is painful. Check them at every trim. Support the dewclaw gently while you trim, and ask for a demonstration if it is hard to position.
What to Do If You Cut the Quick
Nicking the quick happens to careful owners and groomers too. Your dog may yelp or pull away, and the nail will bleed. For a small nick from clipping:
- Stop trimming.
- Apply steady pressure with clean gauze, and use pet styptic powder as its label directs. Cornstarch or flour can work as a backup, according to VCA and the ASPCA.
- Keep your dog calm and quiet while you check that the bleeding has stopped, then end the session with a treat.
- Call your vet if bleeding continues despite first aid. The ASPCA advises calling if it goes on for more than a few minutes.
- Get urgent veterinary help for heavy bleeding, a torn or badly damaged nail, or a dog that seems unwell. VCA’s first aid guide covers pressure and when to go to an emergency clinic.
A torn nail is different from a small clipping nick. Don’t trim or pull at a damaged nail; have your vet look at it.
Next time, take even smaller cuts on that nail. One bad moment doesn’t have to ruin future trims, especially if you go back to a few easy practice sessions full of treats first.
If Your Dog Is Scared or Fights the Trim
If your dog is scared, stop. Forcing a frightened dog through a trim usually makes the next one harder, and with a tiny dog, a struggle raises the risk of injury.
Watch for these stress signals, drawn from VCA and ASPCA guidance:
- Pulling the paw away or trying to escape
- Panting, tense lips or ears pulled back
- Freezing, trembling or looking away
- Whining, growling or snapping
When you see them, go back to an easier step from the comfort plan above. Never scold your dog for being afraid.
There is no rush to finish every nail in one sitting. VCA suggests trimming just one nail per session if that is what your dog can handle, then slowly building up over several weeks.
If your dog stays terrified, get help. Your options include:
- A groomer or vet clinic, who can trim the nails while you keep practicing handling at home.
- Your veterinarian, who can offer sedation at the clinic or may prescribe a mild sedative for trims. Never give your dog any medicine without your vet’s advice.
- A behavior professional, such as a veterinary behaviorist or certified trainer. VCA suggests seeking this help if you are not making progress after a few weeks.
Overgrown Nails Need a Slower Plan
If your dog’s nails are already long, don’t try to fix them in one session. In dogs who haven’t had regular trims, the quick may reach almost to the end of the nail.
That means the nail can’t be cut short right away without hitting the quick. A groomer or vet can handle that first trim. If a nail is painful, or is pressing into or entering the pad, have your veterinarian assess it.
After that, small trims on a regular schedule keep the nails from getting long again. Many groomers trim overgrown nails a little more often at first to help the quick shorten over time. Ask your vet or groomer what schedule suits your dog.
How Kids Can Help Safely
Kids can be great helpers, as long as an adult does the trimming. Very young or rough children can hurt toy dogs during play, so give kids calm, simple jobs:
- Handing over a treat after each nail
- Counting toes out loud
- Gently stroking the dog’s back while it sits in an adult’s lap
- Fetching the towel or putting supplies away
Kids should not hold the clippers or grinder, hold the dog still, or carry the dog during a trim.
Frequently Asked Questions
Can I use human nail clippers on a teacup dog?
It’s better to use clippers made for dogs. The vet guides we reviewed all recommend dog nail clippers or a grinder, and none recommend human clippers. A small pair sized for small dogs or cats gives you a clear view of the tiny nail and more control over each cut.
Do I have to trim all the nails at once?
No. Trimming one or two nails a day is a perfectly good plan, especially while your dog is still learning.
How do I know if I cut too short?
You’ll usually know right away. The nail bleeds, and your dog may yelp or pull back. To avoid it, stop whenever you can’t confidently judge the next cut, and follow the bleeding steps above if a nail does bleed.
Final Thoughts
Learning how to trim a teacup dog’s nails comes down to a few simple habits: tiny cuts, short sessions, a low and steady hold, and plenty of treats. Stop when your dog is stressed, keep styptic powder nearby, and treat professional help as a normal part of care.
Start small this week. Practice handling your dog’s paws, or trim just one nail. If you’d like more confidence first, ask your vet or a vet tech to show you on your own dog at the next visit. For the rest of your dog’s grooming, our guide to teacup poodle grooming covers brushing, bathing and the full routine.

The TeacupDogWorld Editorial Team researches and creates practical guides about small and teacup sized dogs, including breed characteristics, grooming, nutrition, health, training, and everyday care. Our content is developed using reputable veterinary, breed club, and animal welfare sources to help dog owners make better informed decisions.